How to upload an image into s3 bucket
In order to use a repository for uploading images to be used in Taranta, an S3 bucket hosted by SKAO in AWS has been created. Users can upload images to the shared store and then use the links to configure widgets in Taranta, utilizing these images for their dashboards.
The image bucket is intended for use ONLY by developers within SKAO, relying on everyone’s good judgment and adherence to the SKA code of conduct. Each team is responsible for the content uploaded to its own folder. If there is offensive or improperly loaded content, please report it in the Slack channel #proj-taranta-colab. The Taranta team will address the issue.
Retrieve the credentials
There is a single account for uploading content. To obtain the credentials, please send a message to the Slack channel #proj-taranta-colab, writing:
Hi Taranta team, I am <your_name> from <your_team>.
We would like to have credentials to upload images to the s3 bucket.
At that point, you will be provided with credentials for your private account, which you can share with your team. Please do not share the credentials with individuals outside your team. If you don’t have one, we will also create a user linked to your team with which you can log in with Taranta to create your dashboards.
To upload images, you need to download the appropriate software and follow the configurations that we have based on your operating system: Windows, Mac, or Linux.
Windows
For Windows, we recommend using the free S3 Browser software directly from the project website. Once installed and launched, a screen will appear where you need to configure the connection as follows:
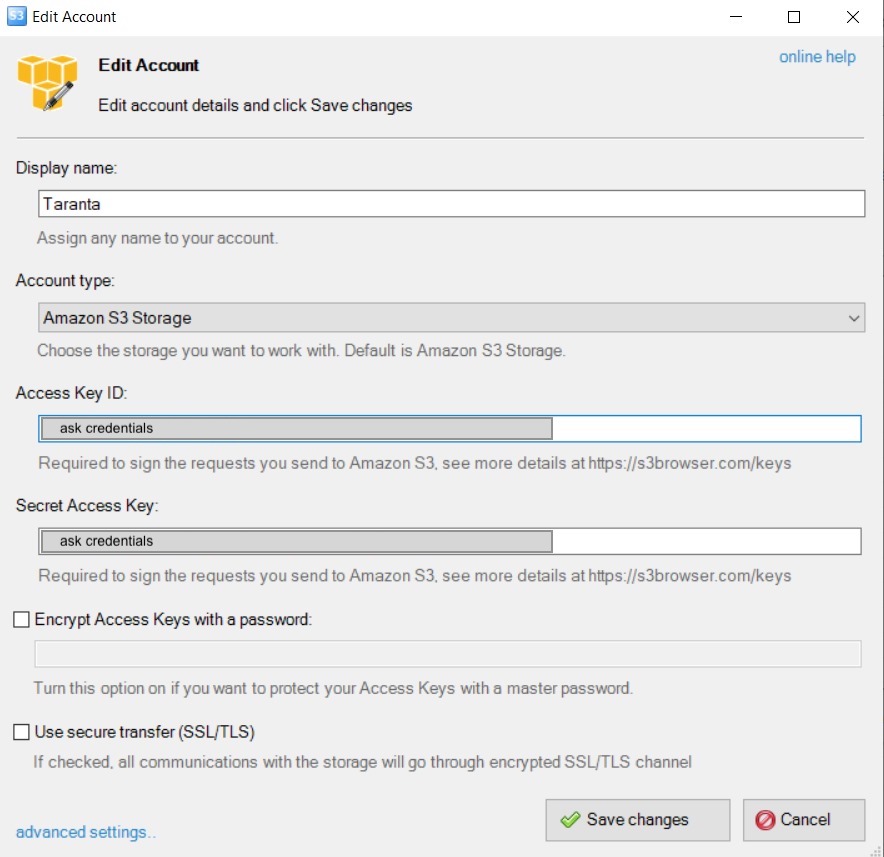
Display Name: a name of your choice to identify your connection
Account Type: Amazon S3 Storage
Access Key ID: Will be sent to you in chat
Secret Access Key: Will be sent to you in chat
Use secure transfer: should be unchecked
Once you click Save Changes, it will attempt to connect to the default bucket, and an error message will appear.
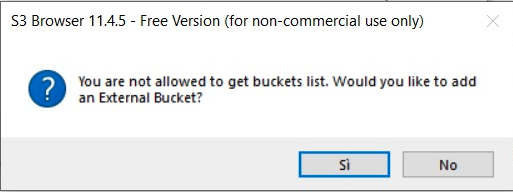
Click Yes, and on this screen, enter the bucket that was sent to you in chat in the BucketName field.
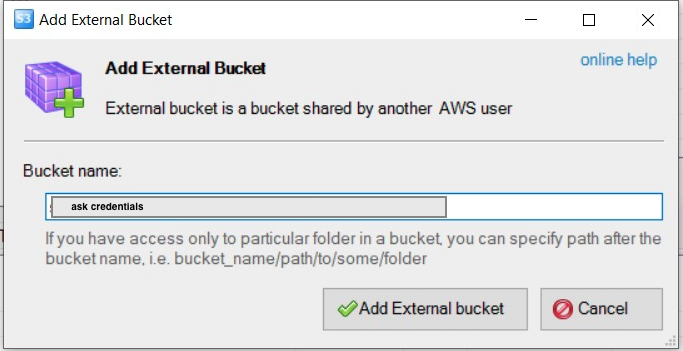
Once you click Add External Bucket, you will be able to navigate.
MacOS
For the MacOS operating system, we recommend using the CrossFTP tool, which can be downloaded from the project website . The software is available in both free and Pro or Enterprise versions. We have found that despite some limited features, the Free version is sufficient for the functionalities needed for uploading images to the bucket.
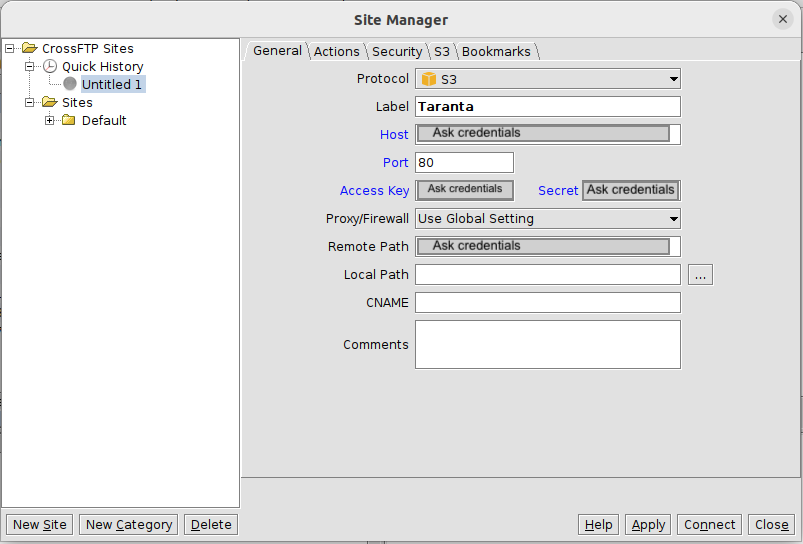
Once the program is installed and opened, go to File -> Connect… A screen will open as shown below. Configure it as shown. Remember to request credentials in our Slack channel.
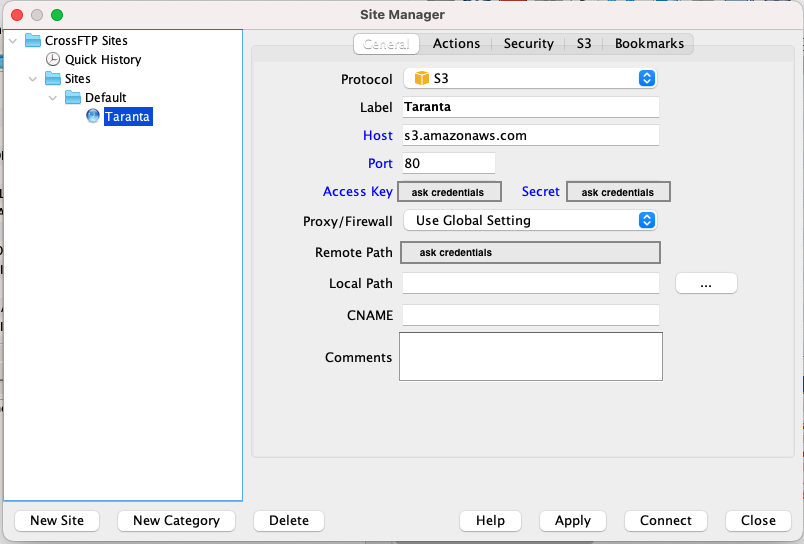
Protocol: S3 / HTTPS
Label: A name of your choice to identify your connection
Host: s3.amazonaws.com (as defined by default)
Port: 443
Access Key: Will be sent to you in chat
Secret: Will be sent to you in chat
Remote Path: Will be sent to you in chat
At this point, click Connect, and the software will connect to the bucket folders.
You can also use other programs, but from our tests, we have noticed that some tools do not allow specifying the port, and if it does not connect to port 80, you will not have access to the folders.
Linux
For the Linux operating system, we recommend using the CrossFTP tool, which can be downloaded from the project website . The software is available in both free and Pro or Enterprise versions. We have found that despite some limited features, the Free version is sufficient for the functionalities needed for uploading images to the bucket.
Once the program is installed and opened, go to File -> Connect… A screen will open as shown below. Configure it as shown. Remember to request credentials in our Slack channel.
Protocol: S3 / HTTPS
Label: A name of your choice to identify your connection
Host: s3.amazonaws.com (as defined by default)
Port: 443
Access Key: Will be sent to you in chat
Secret: Will be sent to you in chat
Remote Path: Will be sent to you in chat
At this point, click Connect, and the software will connect to the bucket folders.
You can also use other programs, but from our tests, we have noticed that some tools do not allow specifying the port, and if it does not connect to port 80, you will not have access to the folders.
Upload the images
Once logged in, enter the folder ‘images’ and click the folder with the name of your team, which is the same as your Taranta account name, and upload the images there. You can also create subfolders within the team folder, leaving the team in charge of managing the internal space.
Warning
The credential permissions are read and write only, not for modification or deletion. This means that if you have uploaded an image that you want to delete, you must write to the team in the Slack channel or privately to one of the Taranta developers, who will ask SKAO’s IT support to delete that file.
Once the images are uploaded, they can be accessed via the web using the address: https://taranta-image-hosting.skao.int/<TEAM_NAME>/<your_file>.<extension>
For example: https://taranta-image-hosting.skao.int/CREAM/taranta.jpg