Target Page
The Target Page allows you to add target(s) to your submission (see Figure 11).
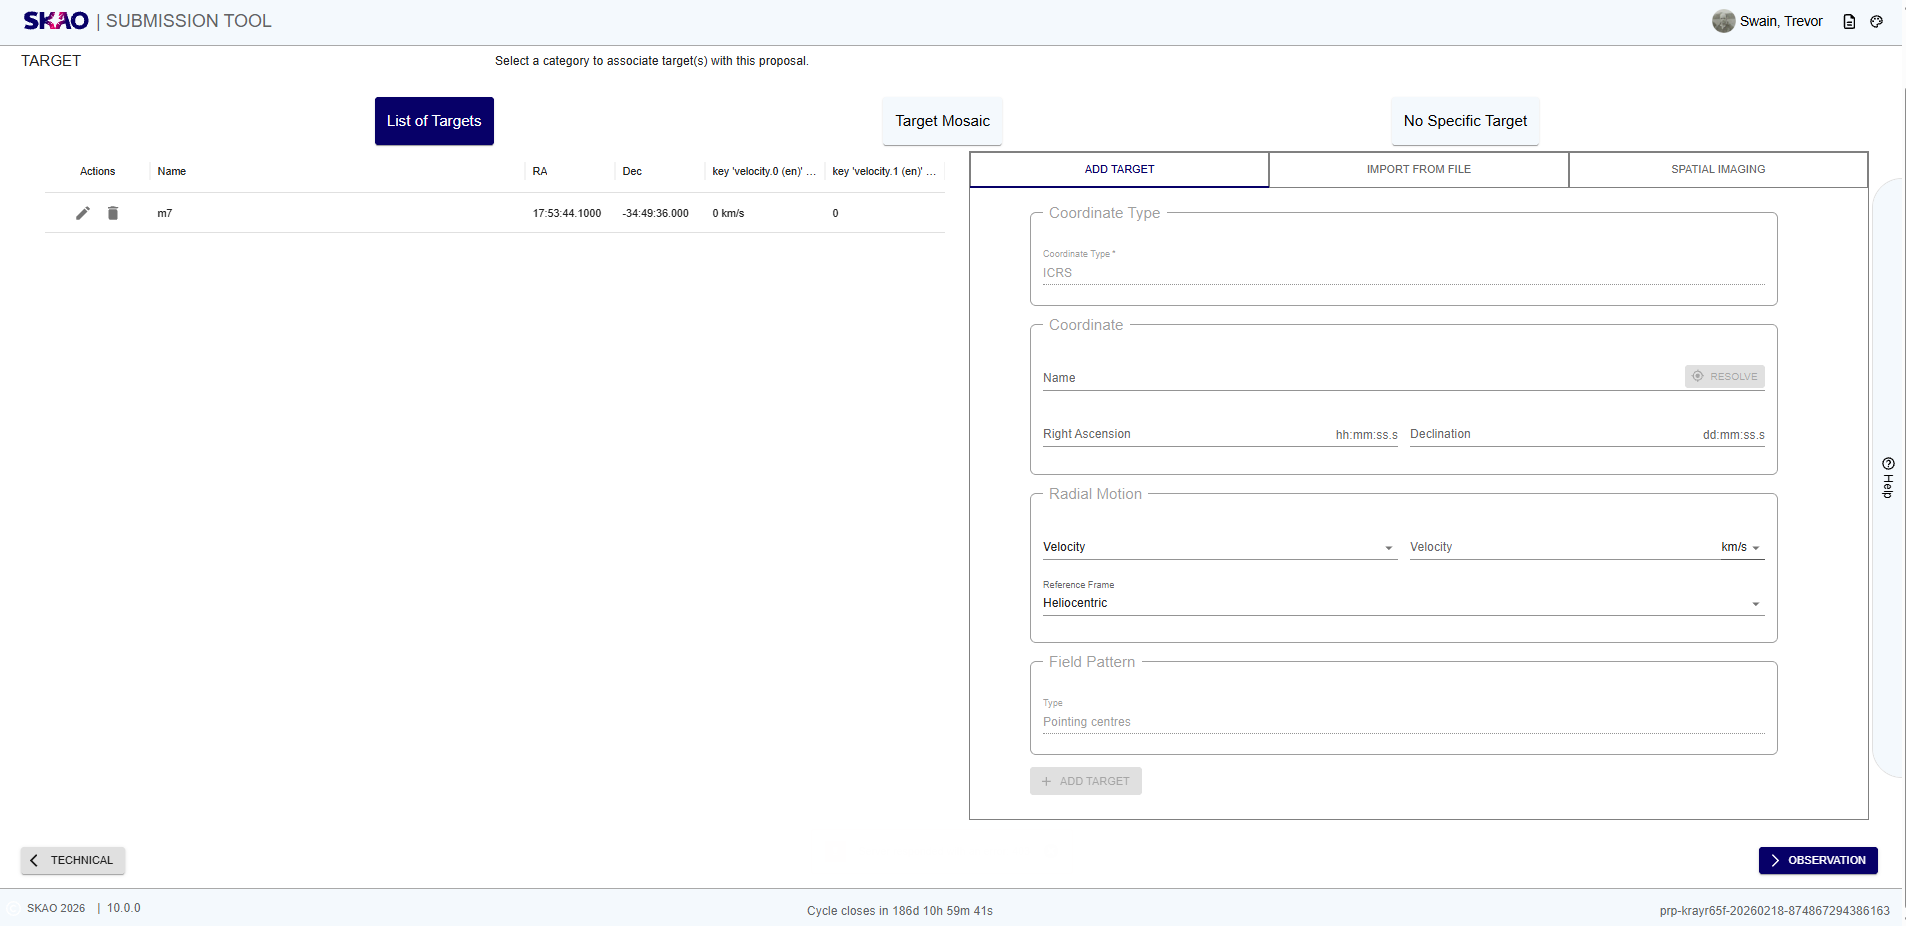
Figure 35 : Target page for ‘List of Targets’
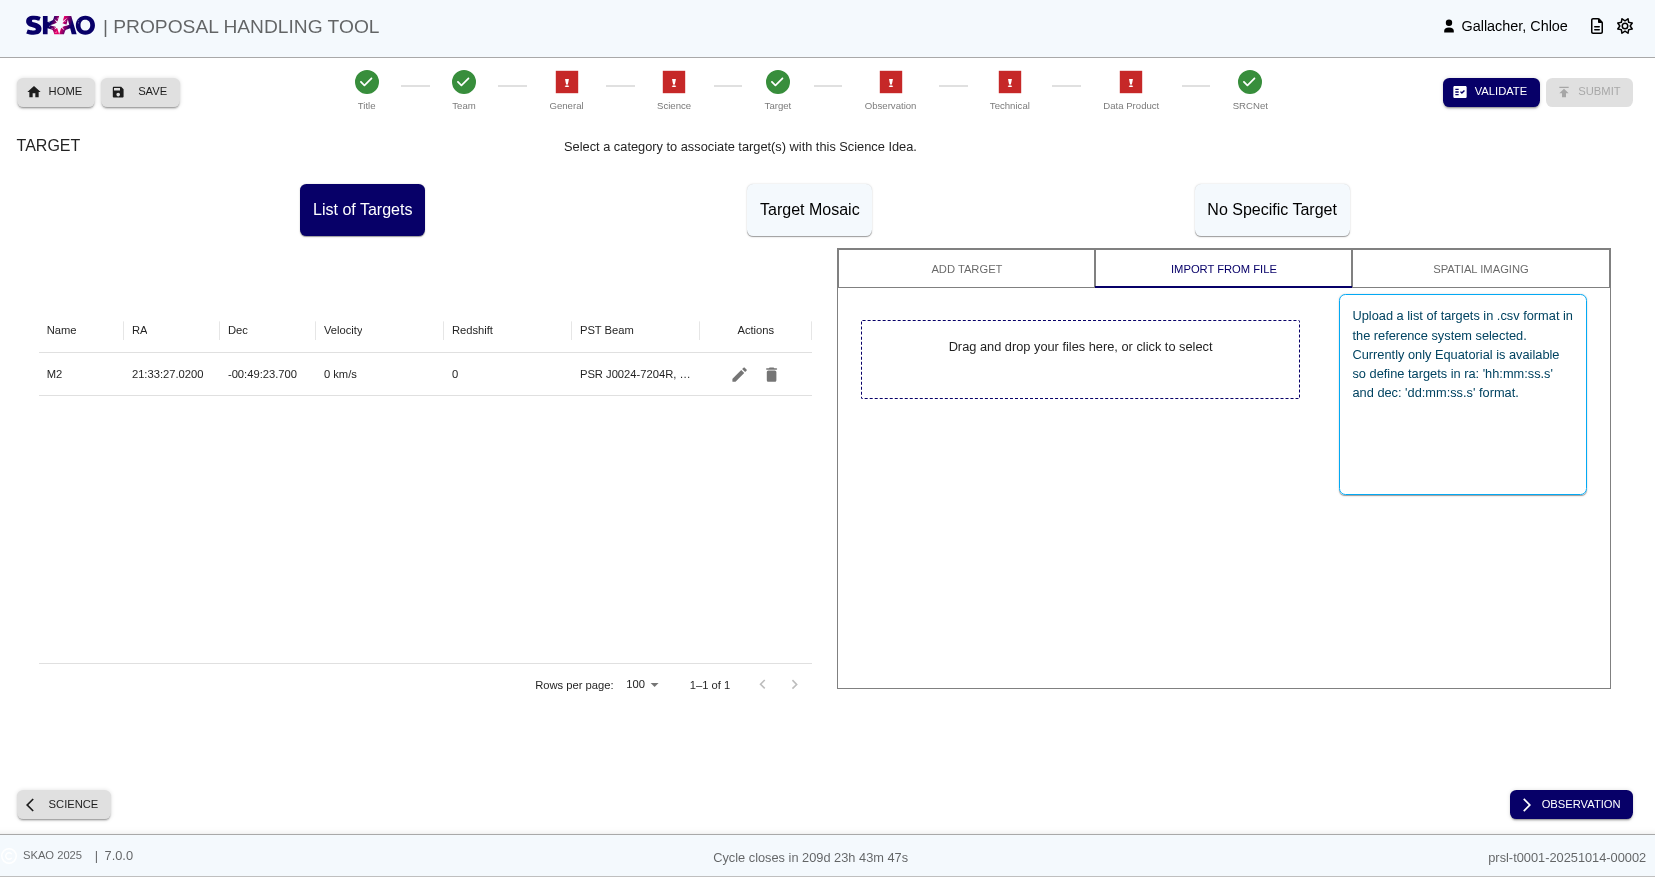
Figure 36 : Target page for ‘Import Targets’
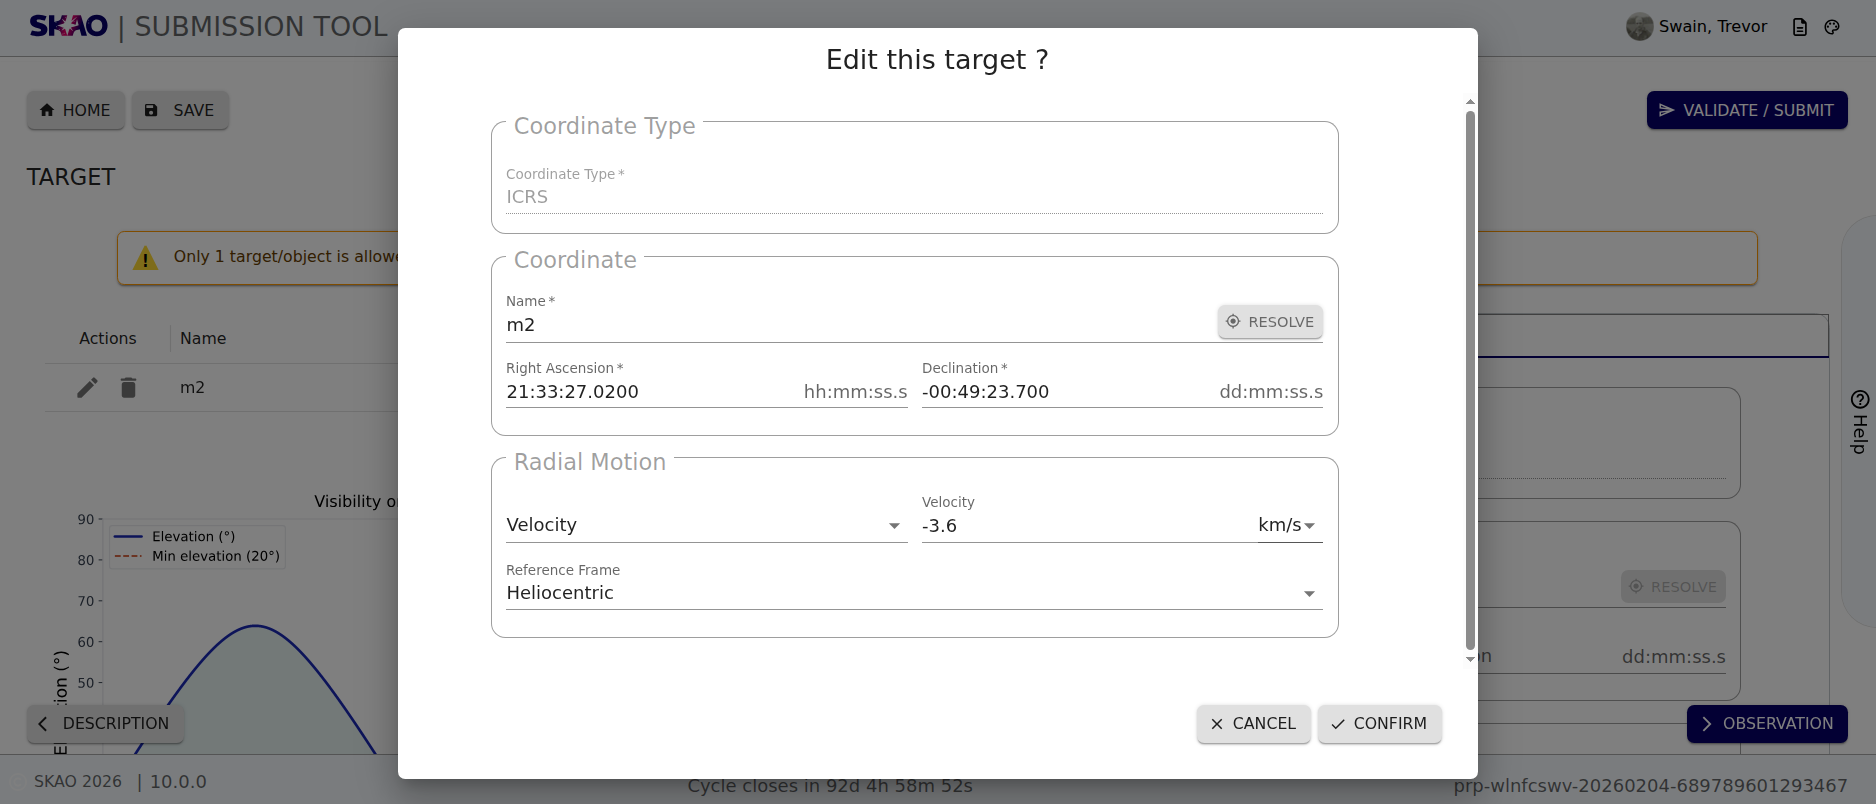
Figure 37 : Target page showing modal to edit target
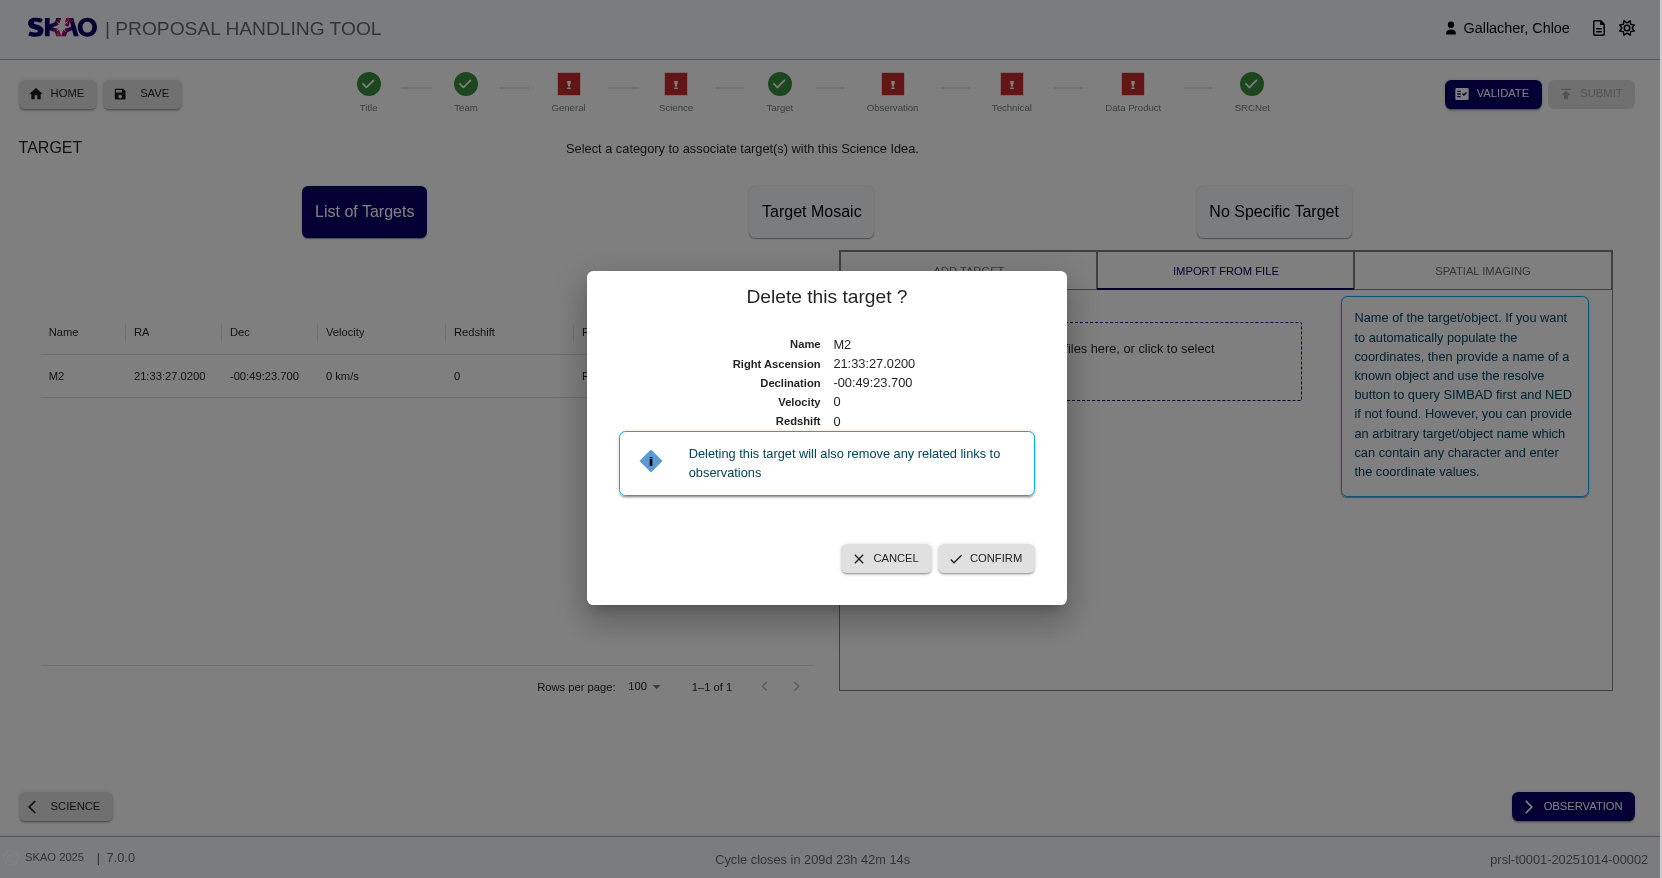
Figure 38 : Target page showing modal to delete target
Layout and Navigation
The layout of the Target Page shows three different ways to specify targets (top of page):
List of Targets: The default reference system is the ICRS (the only system available at the moment).
Left side shows a table with the columns below:
Right side:
Add Target: Add individual targets by providing details of the target such as the name and coordinates (see Figure 11). The velocity/redshift field is optional to specify the velocity (km/s or m/s) or redshift. For known targets, these parameters can be auto-populated by querying the SIMBAD or NED database using the
 button with the name e.g
 M2. If the target name is not recognised, the error textUnable to resolve provided nameis displayed. PST Beam(s) can be added to the target by clicking the ‘Multiple Beams’ radio button. Click the ‘Add’ button and provide details of the beam such as the name and coordinates before clicking the ‘Confirm button’. For known beams, these parameters can be auto-populated by querying the SIMBAD or NED database using the ‘Resolve’ button.Import from file: Add a list of targets by uploading a
.csvfile (see Figure 36). This is controlled by the selected reference system. For ICRS, the csv header should bename, ra, dec. If a file with a wrong format is uploaded, the errorICRS schema is invalid. For rows with empty values in any fields, the rows will be omitted.Spatial Imaging: Not available at the moment.
Target Mosaic: Not available at the moment.
No Specific Target: Not available at the moment.


Key Information and Actions
Add target: Use the entry form on the right of the page, under the tab ‘’Add Target’’.
Edit target: When selected, a modal is displayed with a form containing details of the selected target (see Figure 12). These fields can be adjusted and will update the target upon confirmation.
Delete targets: When selected, a modal is displayed showing details of the selected target (see Figure 13). There is the option to confirm or cancel. If confirmation is selected, then the target is removed, as well as any links to observations.
Resolve Targets: Resolve targets by name using the
button which allows you to query SIMBAD or NED.
This is available as part of the functionality of ‘’Add Target’’
Have questions or need technical assistance? Contact SKAO Help desk ·