SVG Rules
Using Inkscape to Apply Rules
Rules allow dynamic visibility of SVG elements based on specific conditions defined in the description field. This feature enhances the capability to create interactive and conditional visual representations.
Steps:
Open your SVG file in Inkscape.
Create and position the object call it rules
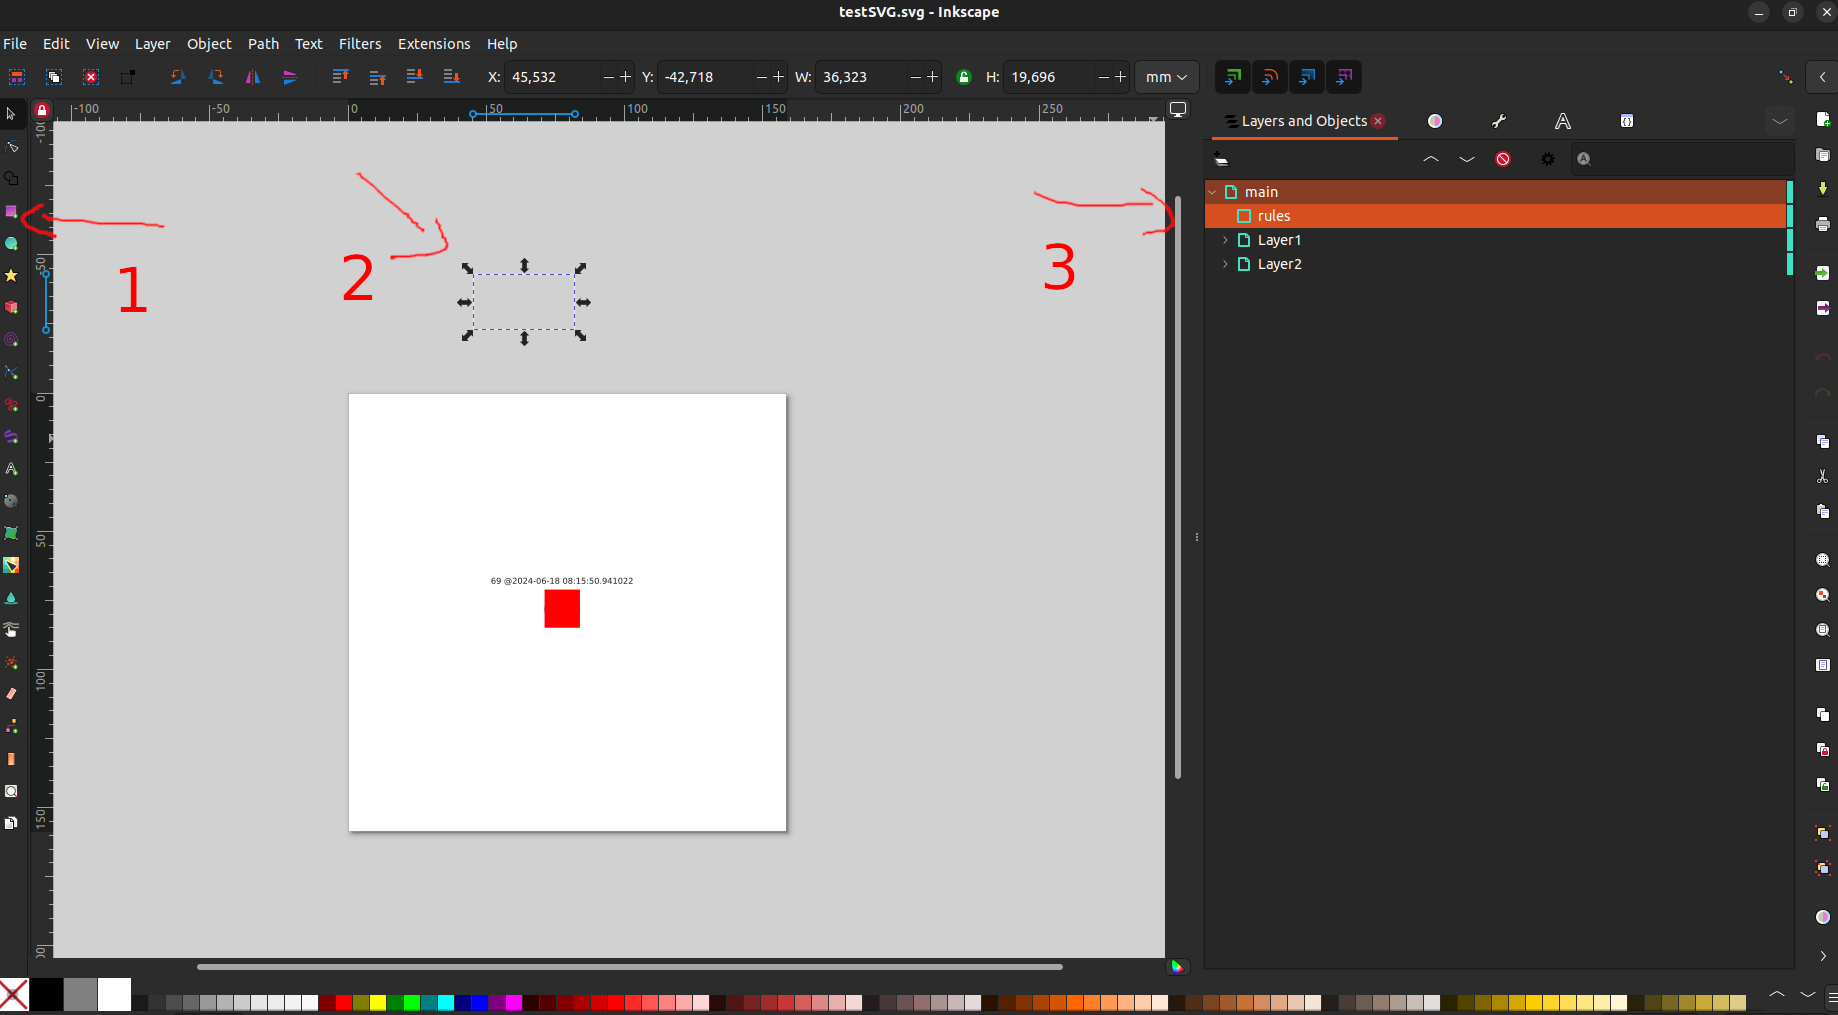
We suggest that you don’t fill the object so that it is hidden on canvas and it’s used only for setting rules. Since its hidden, you can use layers and Objects to find rules
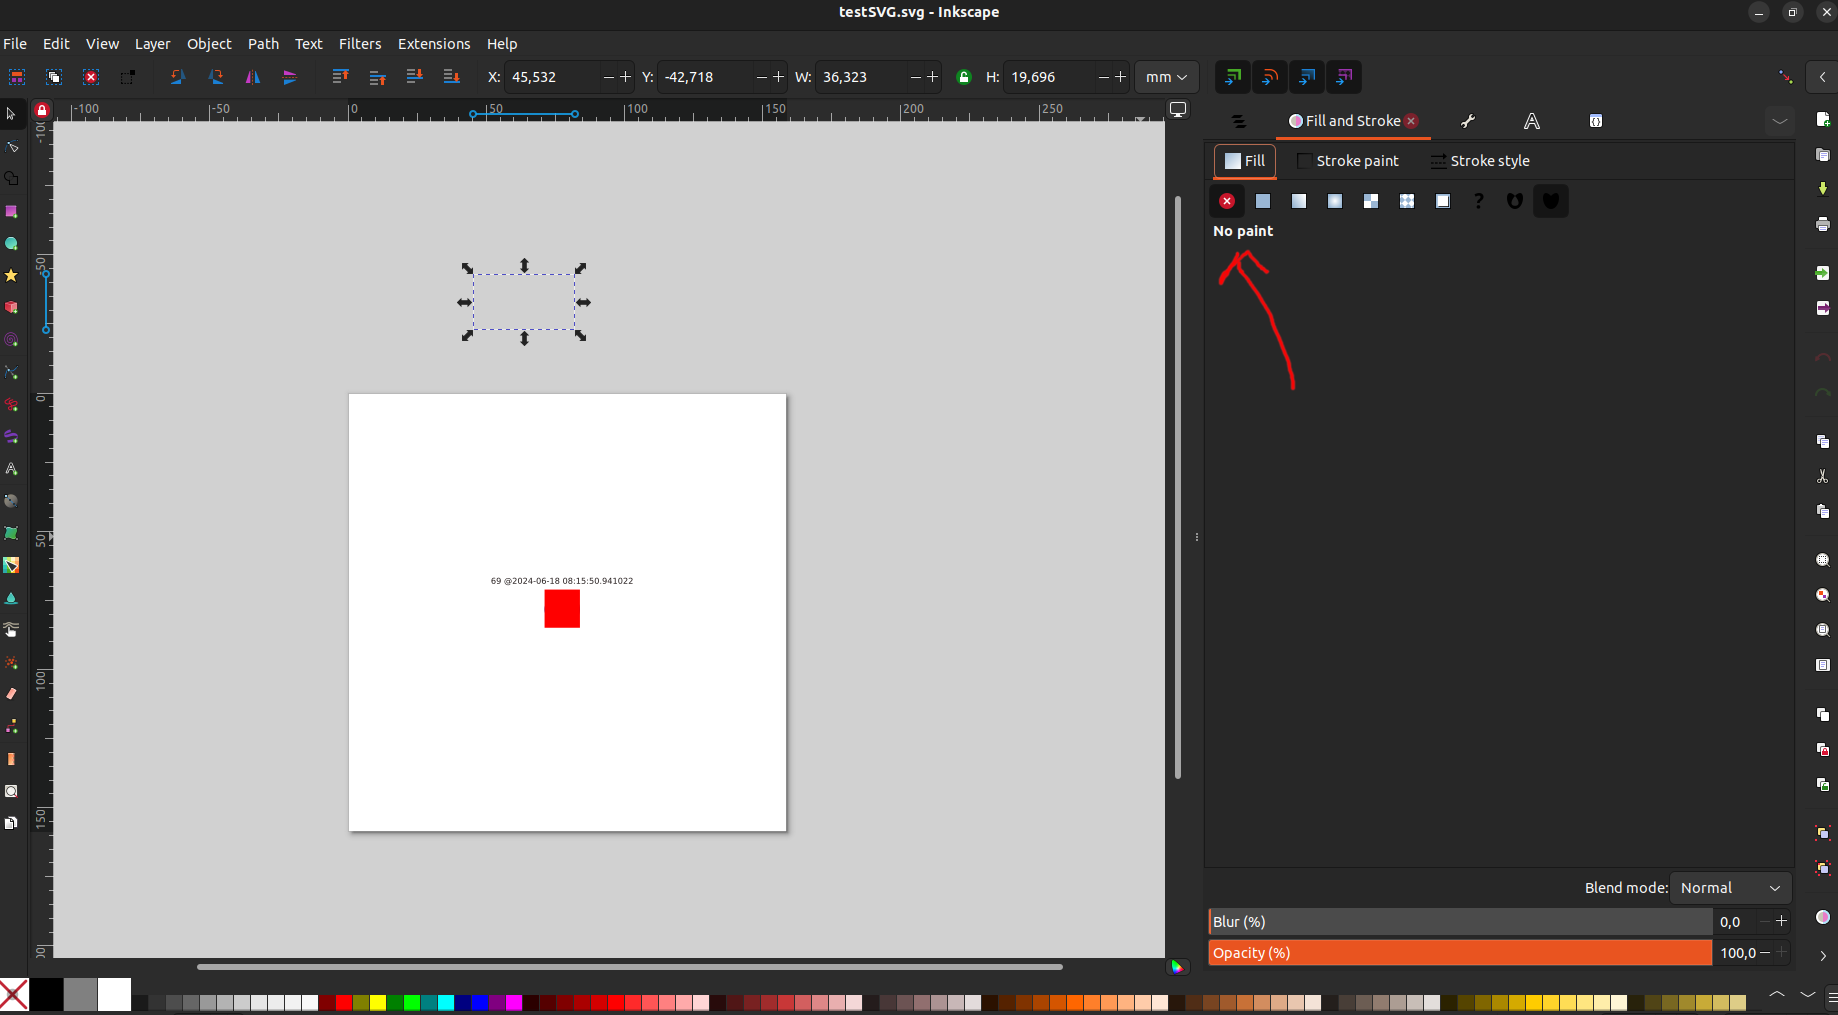
Set up the rule in the Object Properties panel. Note: add a label to it with name `rules`. Click on `Set` button at bottom right to save object properties
Note: Every rule should start with `rule`. For example ruleCSP, rule_CBF, etc.
Example Configuration
In this example, we configure a rule named rule1 to control the visibility of layer2. layer2 is visible based on the condition value > 21.
Here value refers to the attribute defined in model(model=sys/tg_test/1/short_scalar).
For eg if value of sys/tg_test/1/short_scalar is 20 then layer2 will be hidden.
 rule1: {
   type=layer
   model=sys/tg_test/1/short_scalar
   layer=layer2
   condition=value > 21
}
Note:
model, layer and condition are keywords. Any syntax error in these keywords would result in excluding that rule during run mode.
In above rule layer2 is an SVG Element which will be visible if condition in that rule evaluates to true, o/w layer2 will be hidden.
layer2could be an SVG Layer or an SVG element. The default name assigned to new layer in InkScape isLayer<space>{n}, remember the space in between while using it to define the rules.If a layer is used in an rule (for dynamic visibility), then that layer will not be shown in
synoptics > thumbnail(bottm left).The `label` defined for an SVG elements should match with the one used to define the rules. The labels are
case sensitive.The condition in a rule contains
valuekeyword which refers to the value of model in that rule.While defining the rule, a model can have only
one device attributeand can refer to any of the device’s attributes.
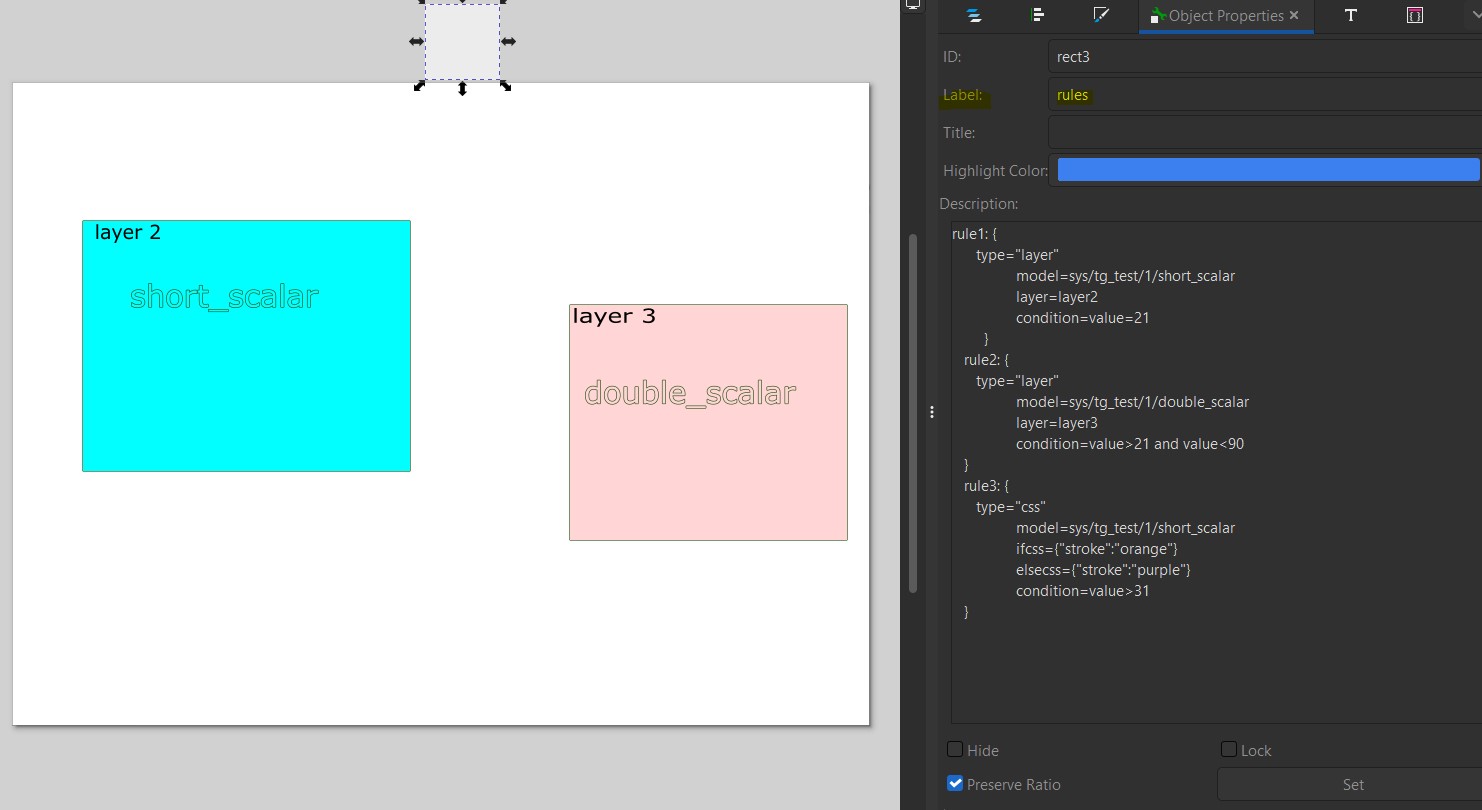
Example 2: Multiple Rules
You can define all rules required for the SVG at a common place. Multiple rules can be added to control visibility of different layers based on various conditions. For instance, layer2 will be visible when short_scalar = 21 and layer3 visible when double_scalar > 21 and double_scalar < 90.
rule1: {
   type=layer
   model=sys/tg_test/1/short_scalar
   layer=layer2
   condition=value==21
}
rule2: {
   type=layer
   model=sys/tg_test/1/double_scalar
   layer=layer3
   condition=value>21 and value<90
}
rule3: {
   type=css
   model=sys/tg_test/1/short_scalar
   ifcss={"stroke":"orange", "fill":"green"}
   elsecss={"stroke":"purple"}
   condition=value>31
}
There are two types supported now:
layer:
This is used to hide/show an layer or an SVG element based on condition.
css:
This is used to apply conditional css to svg element during run mode.
In above rule3, the stroke color(text color) of short_scalar changes based on condition. This can be useful in highlighting alarming sitations.
Note: The ifcss & elsecss should be a valid json object. You can have multiple comma separated css
Conclusion
Using rules in your SVG components allows for dynamic and interactive visualizations based on real-time data. By following the steps and examples provided, you can create sophisticated SVGs that respond to specific conditions and enhance the user experience.