Observation Page
This guide explains the “Observation Page”, where you seamlessly define your observation needs.

Layout and Navigation
The Observation Page consists of two distinct sections:
Observation List and Target Selection:
Left side:
Add Observation: Click this button to create a new observation entry.
Observation List: View a table summarizing existing observations with details like telescope, array, type, and actions (delete).
Right side:
Target List: Select targets associated with the chosen observation by ticking the checkboxes. Use “Selected” and “Not Selected” buttons for bulk actions.
Observation Mode Details:
This section appears upon clicking “Add Observation”.
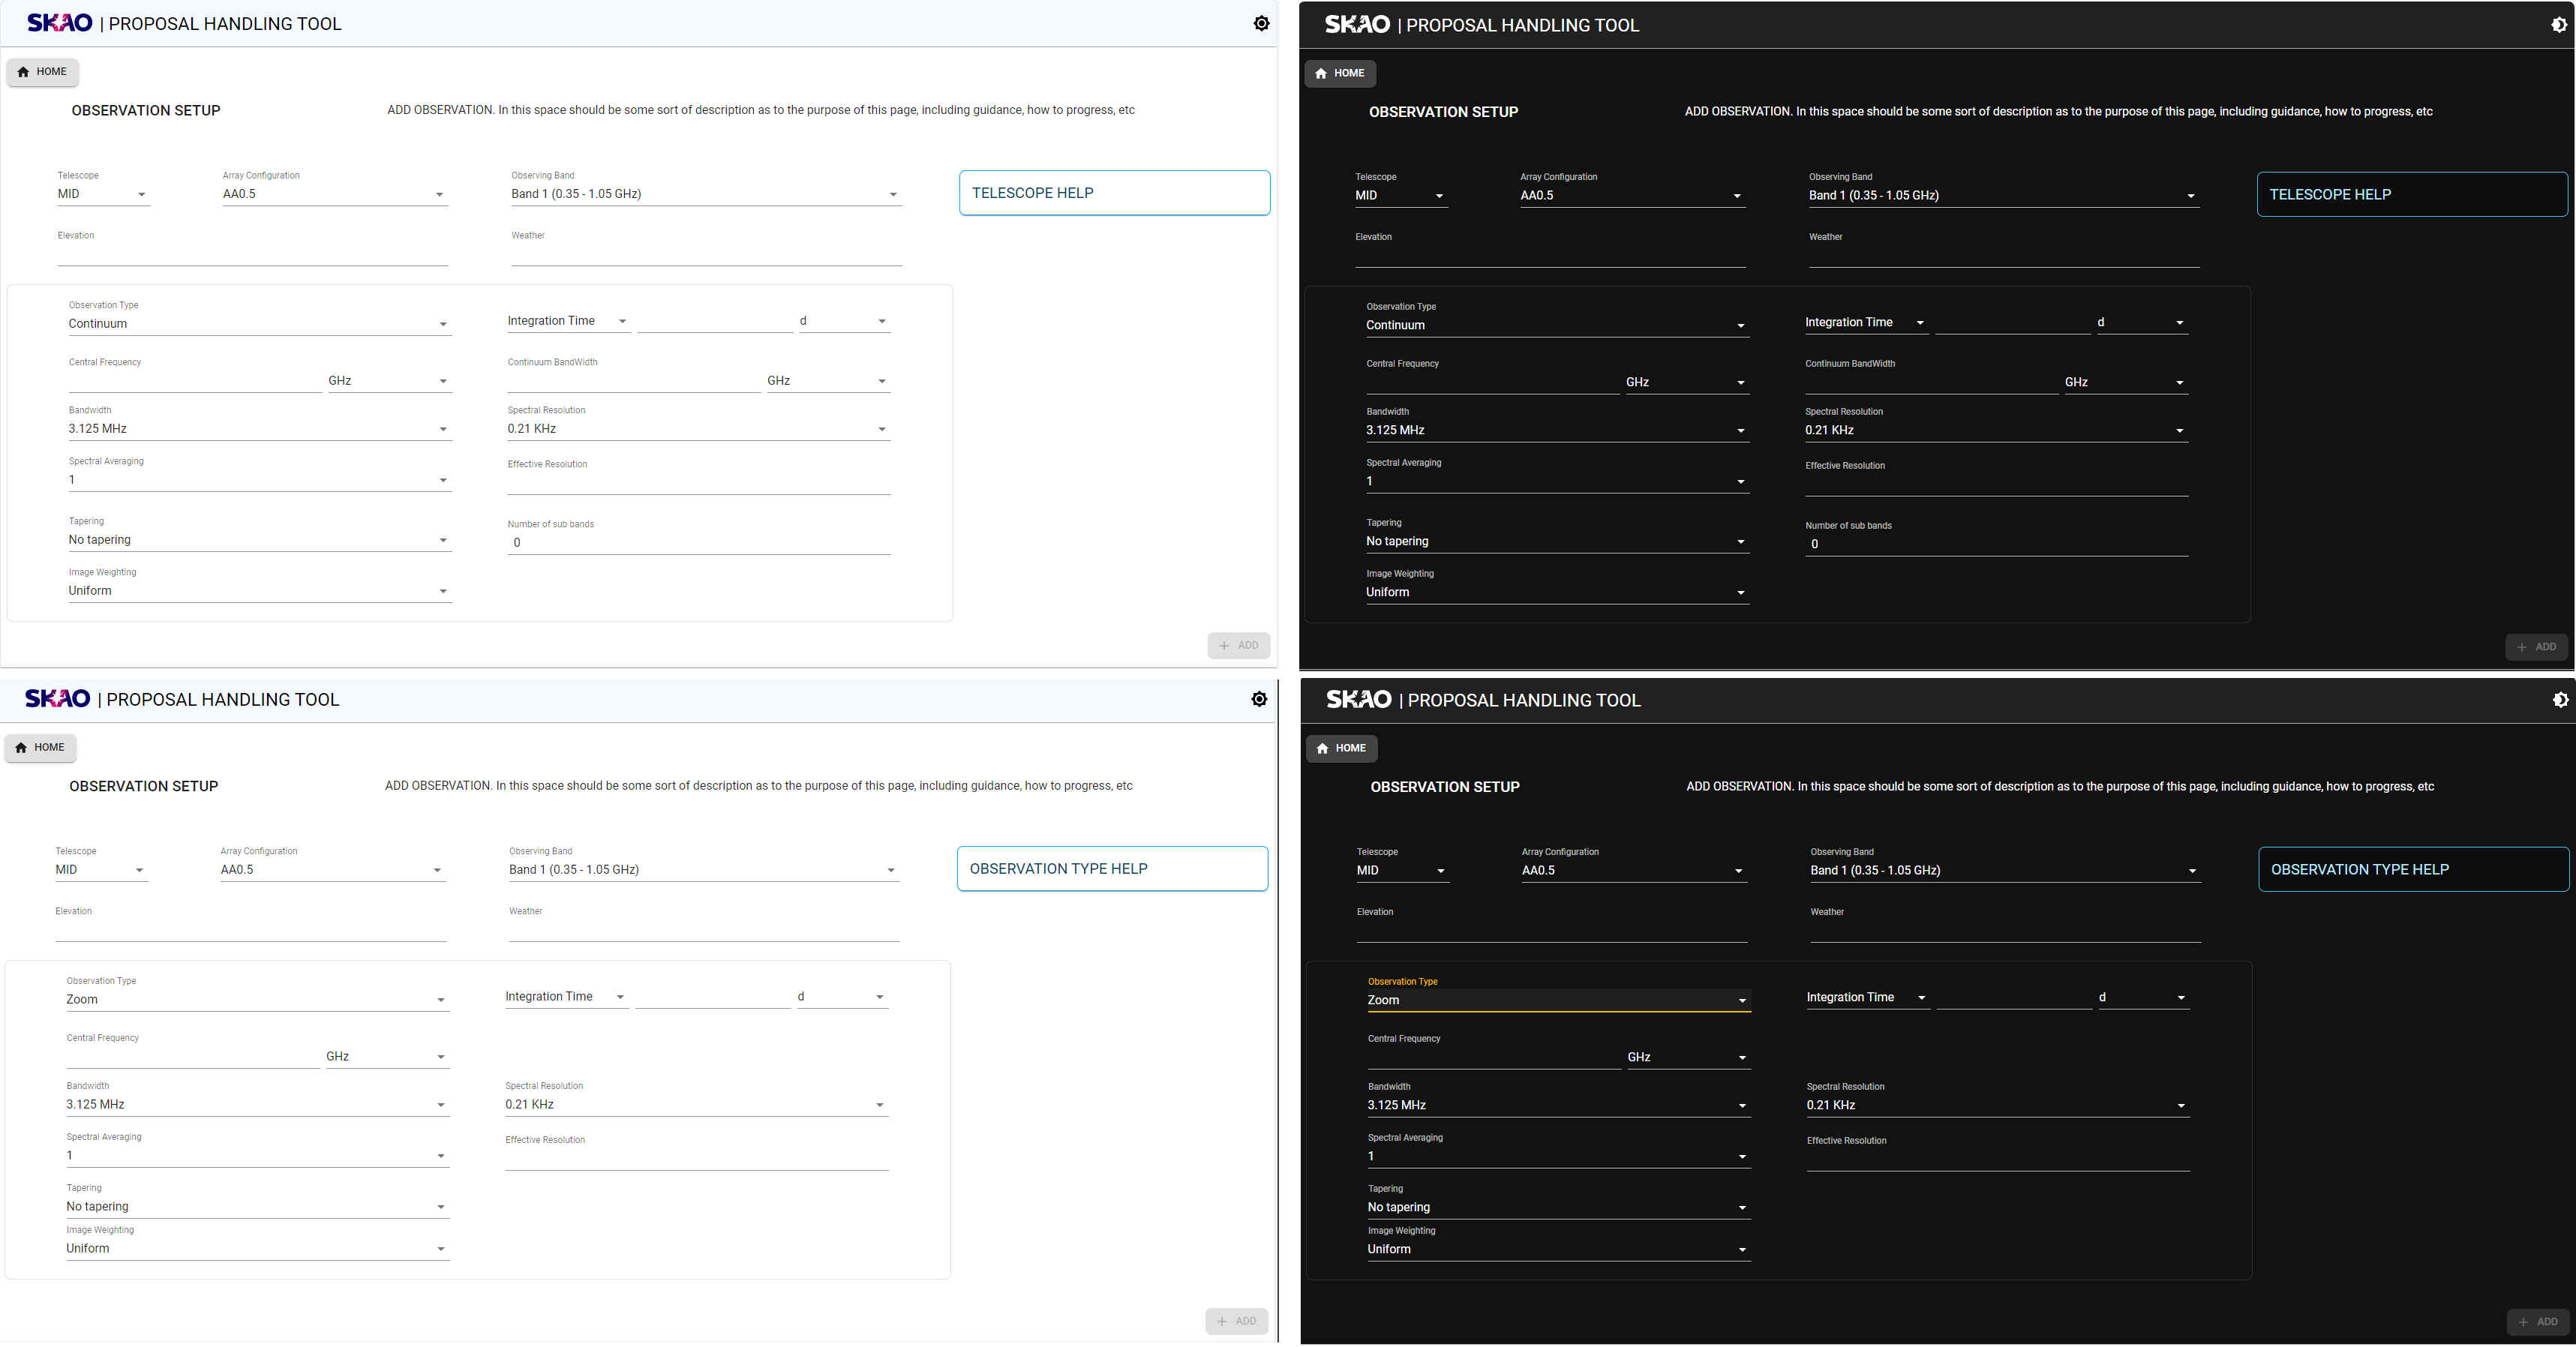
Enter specific parameters including:
Array Configuration: Dropdown menu to choose available configurations.
Observation Type: Select either “Continuum” or “Zoom” mode.
Other fields: Additional details may appear based on your selections, influenced by the Sensitivity Calculator.
Add: Once finished, click this button to add the defined observation to the list.
Additional Features
SKAO Standard Header and Footer: Provides branding and navigation to other resources.
Sun/Moon Mode Toggle: (Top right corner) Adjusts the page contrast for accessibility.

A status indicator at the top shows the validation status of each page in the flow.
Each status indicator, when clicked, will navigate to the appropriate page

Key Information and Actions
The Observation Page allows you to:
Create new observation entries.
Link observations to specific targets.
Define key parameters like array configuration, observation type, and additional details.
View and manage your observation list.
Utilize dynamic help for field descriptions.
Next Steps
After specifying your observation details using the provided methods, click “Technical” to proceed to the next page, where you’ll provide more specific technical information about your proposal.
Additional Notes
This guide assumes you’re already logged in to PPT.
The content remains the same regardless of your user context.
Dynamic help is available, when you hover over fields, for descriptions.
Remember to save your progress regularly using the “Save” button.
The “Submit” button will only become active when all required information is entered and validated.
Confirmation Summary
Before submitting your details, ensure everything is correct by clicking ‘Validate’. Clicking ‘Submit’ after that will bring up a Confirmation Page summarizing your details. Review and click ‘Confirm’ to proceed or ‘Cancel’ to make changes.