PyCharm Professional Docker configuration#
These instructions show how to configure PyCharm Professional for SKA control system development using the SKA Docker images. PyCharm can be configured to use the Python interpreter inside a Docker image, which allows:
development and testing without requiring a local Tango installation;
the development environment to be identical to the testing and deployment environment, eliminating problems that occur due to differences in execution environment.
Follow the steps below to configure PyCharm to develop new code and run tests for the ska-tango-examples project using the Docker images for the project.
Prerequisites#
Make sure that the following prerequistes are met:
Docker is installed, as described on the page Docker Docs.
PyCharm Professional must be installed. PyCharm Community is not sufficient!
You have basic familiarity with PyCharm. If this is the first time you have used PyCharm, follow the First Steps tutorials so that you know how to use PyCharm to develop, debug, and test a simple Python application using a local Python interpreter.
Clone the ska-tango-examples project#
PyCharm allows you to check out (in Git terms clone) an existing repository and create a new project based on the data you’ve downloaded.
From the main menu, choose VCS | Checkout from Version Control | Git, or, if no project is currently opened, choose Checkout from Version Control | Git on the Welcome screen.
In the Clone Repository dialog, specify the URL of the ska-tango-examples repository (you can click Test to make sure that connection to the remote can be established).
In the Directory field, specify the path where the folder for your local Git repository will be created into which the remote repository will be cloned. The dialog should now look similar to this:
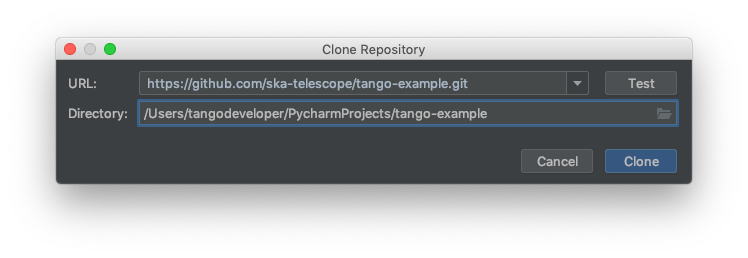
Click Clone, then click Yes in the subsequent confirmation dialog to create a PyCharm project based on the sources you have cloned.
Build the application image#
With the source code source code checked out, the next step is to build a Docker image for the application. This image will contain the Python environment which will we will later connect to PyCharm.
Begin a terminal session in the cloned repository directory and build the image:
~/dev/ska-tango-examples master 23:16:46 ─
❯ make build ─╯
[+] Building 92.6s (14/14) FINISHED
=> [internal] load build definition from Dockerfile 0.0s
=> => transferring dockerfile: 453B 0.0s
=> [internal] load .dockerignore 0.0s
=> => transferring context: 259B 0.0s
=> [internal] load metadata for artefact.skao.int/ska-tango-images-pytango-runtime:9.3.14 0.2s
=> [buildenv 1/1] FROM artefact.skao.int/ska-tango-images-pytango-builder:9.3.16 81.5s
=> => resolve artefact.skao.int/ska-tango-images-pytango-builder:9.3.16 0.2s
=> => sha256:5686237a38ebe49118e3c56be46cb1351f6fd07b13a4c0b916a358df074d8d1f 190B / 190B 0.0s
...
=> [stage-1 1/5] FROM artefact.skao.int/ska-tango-images-pytango-runtime:9.3.14@sha256:b0d8a67d16818b72cb9ebf84a36431c0f5ef1ace854c4315 42.6s
=> => resolve artefact.skao.int/ska-tango-images-pytango-runtime:9.3.14@sha256:b0d8a67d16818b72cb9ebf84a36431c0f5ef1ace854c4315930ea775b 0.0s
=> => sha256:0e970d6d4e3a68ec13536739109feda96a289da2bc803637cbe43d86c2def2d9 1.02MB / 1.02MB 0.4s
...
=> => extracting sha256:fe6a2e4a5243a99c379de5984e484667782be80029db7221c2a1cb411eedb0e6 0.0s
=> => extracting sha256:48447e4613545e45c5c2f01304305bb742d43091b0458a8f56c3f93e7e28ac17 0.0s
=> [internal] load build context 1.2s
=> => transferring context: 288.02MB 1.2s
=> [stage-1 2/5] COPY --chown=tango:tango . /app 1.1s
=> [stage-1 3/5] COPY --from=buildenv /usr/local/bin/ /usr/local/bin/ 0.1s
=> [stage-1 4/5] WORKDIR /app 0.0s
=> [stage-1 5/5] RUN ipython profile create 0.5s
=> [stage-1 6/5] COPY requirements.txt /app/requirements.txt 0.0s
=> [stage-1 7/5] RUN python3 -m pip install -r /app/requirements.txt 5.3s
=> [stage-1 8/5] RUN python3 -m pip install . 2.7s
=> exporting to image 1.1s
=> => exporting layers 1.1s
=> => writing image sha256:9ed46b8e9b2ee5457a650b93e3cbf1e12a4fc3613b9c38028401ca7e9c52de74 0.0s
=> => naming to artefact.skao.int/ska-tango-examples:0.4.17
The last lines of terminal output displays the name and tags of the resulting images, e.g.,
...
 => exporting to image                                                                                                                              1.1s
 => => exporting layers                                                                                                                             1.1s
 => => writing image sha256:9ed46b8e9b2ee5457a650b93e3cbf1e12a4fc3613b9c38028401ca7e9c52de74                                                        0.0s
 => => naming to artefact.skao.int/ska-tango-examples:0.4.17
In the example above, the image name is tagged as artefact.skao.int/ska-tango-examples:0.4.17. Take a note of the tagged image as you will need it when configuring the remote interpreter.
Configure the remote interpreter#
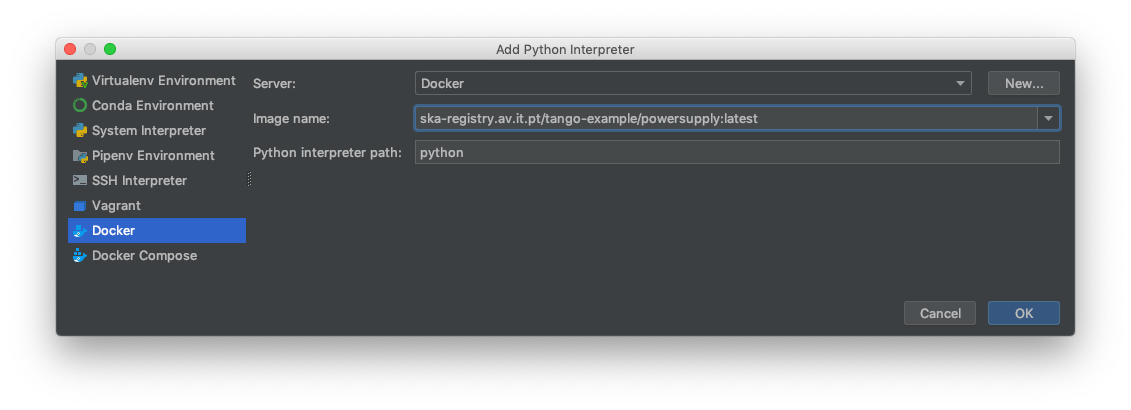
Following the official PyCharm documentation, configure Docker as a remote interpreter using the image you just created. The ‘Add Python Interpreter’ dialog should look similar to this:
As a result, the Python interpreter Preferences dialog should look something like this:
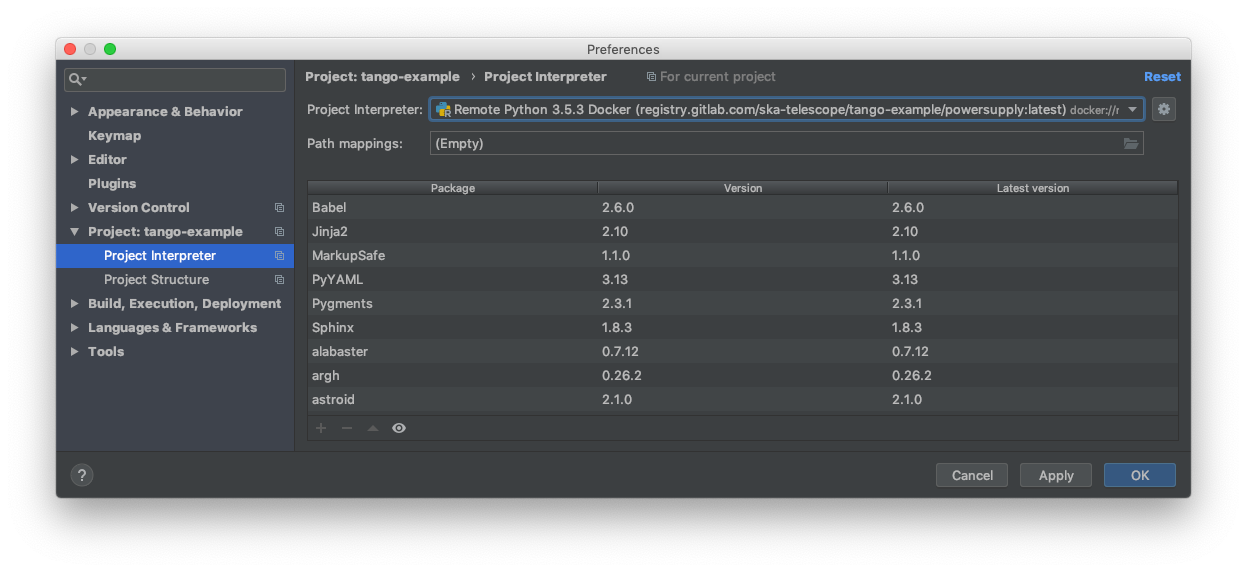
Click ‘OK’ to apply your changes.
You can now navigate through the project. As an exercise, open the source code for the PowerSupply class, which is
defined in powersupply/powersupply.py. Notice that the IDE notifications and intellisense / code completion are now
based on information gathered from the remote Docker interpreter. Below an import statement, try typing
from tango import and activate code completion (ctrl+space). Notice how the tango packages installed in the
Docker image are suggested to complete the statement.
Whenever you change the Python environment, for example by adding or removing dependencies in Piplock, after rebuilding the Docker image you should regenerate the project skeletons to make PyCharm aware of the changes. To do this, select File | Invalidate Caches / Restart… from the main menu.
Running unit tests#
The ska-tango-examples project illustrates two types of unit test:
Self-contained unit tests that execute within the confines of a single Docker container. These tests use the Tango class DeviceTestContext, which provides a mock connection to a Tango database. In the ska-tango-examples project, these tests are found in tests/test_1_server_in_devicetestcontext.py.
Unit tests that exercise a device in a real Tango environment, with connections to a Tango database and other devices. utilise require a connection. In the ska-tango-examples project, these tests are found in tests/test_2_test_server_using_client.py.
This tutorial illustrates how to run the self-contained unit tests described in 1.
From the main menu, choose Run | Edit Configurations… and click on the ‘+’ button to add a new configuration. From the menu that appears, select Python tests | pytest to add a new pytest test configuration. The menu selection looks like this:

Change the Target radio button to ‘Module Name’. Click ‘…’ to select the target, choosing test_1_server_in_devicetestcontext as the module to be tested.
Select ‘Project Default’ as the Python interpreter for this configuration.
Note
If you change the project default interpreter to another configuration then you may want to revisit this run/debug configuration and explicitly select the Docker image interpreter rather than use the project default.
The configuration dialog should look like similar to this:
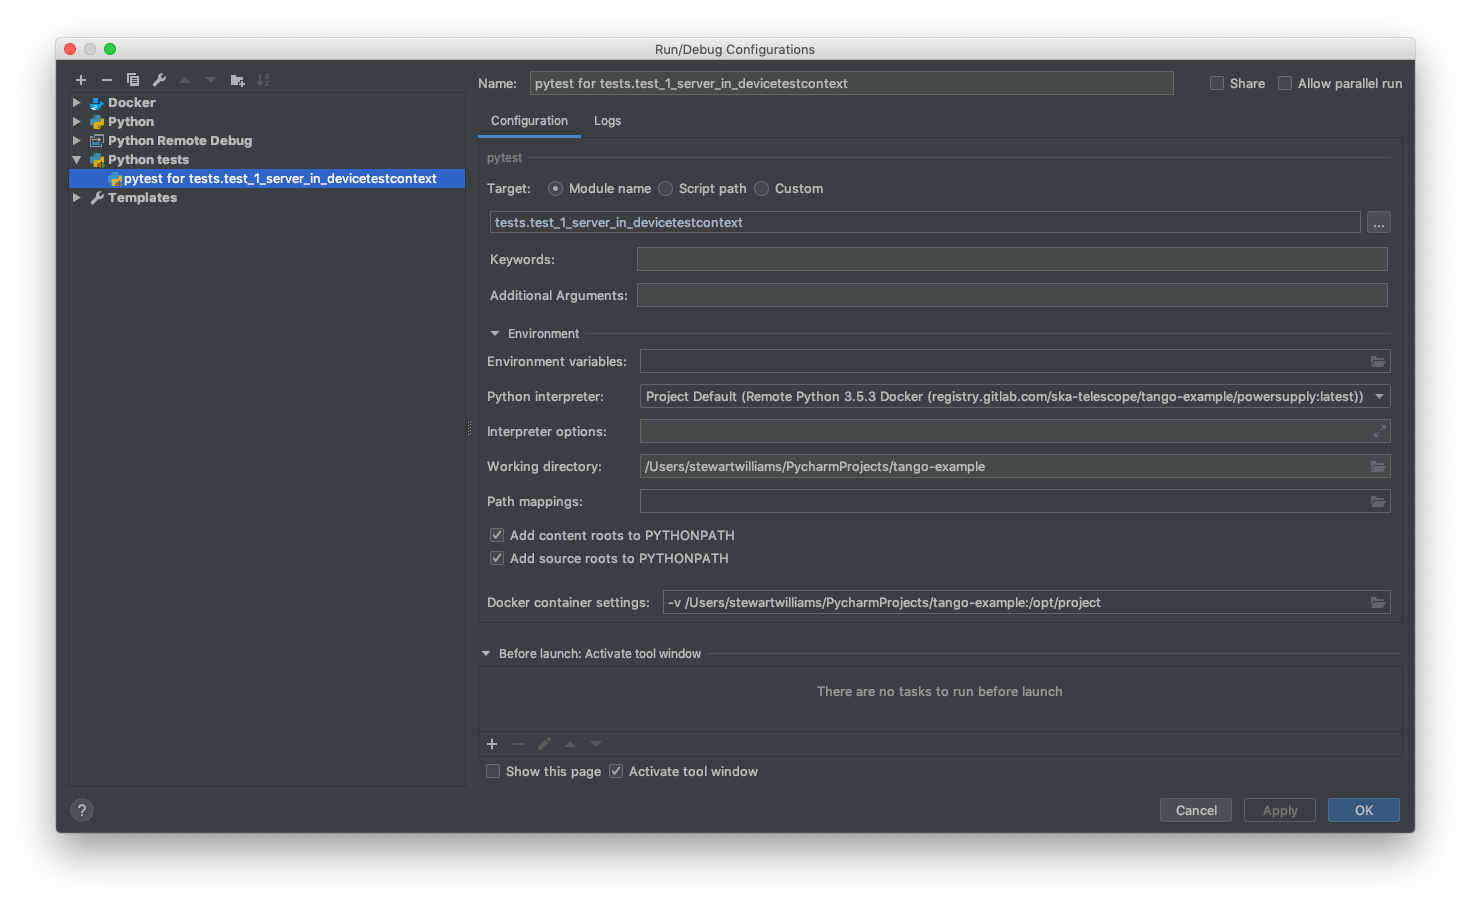
Click ‘OK’ to accept your changes.
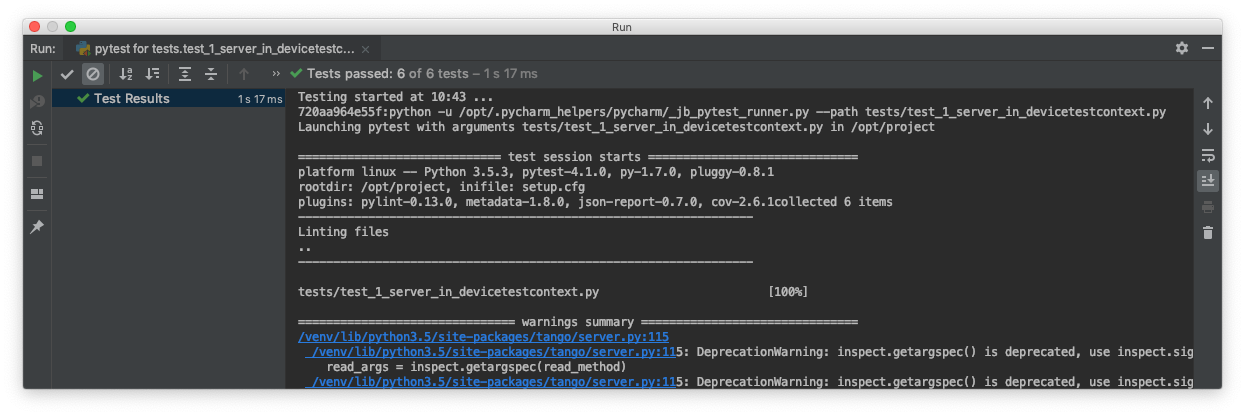
From the main menu, choose Run | Run…, then from the Run dialog that opens, select the configuration you just created. The unit tests will execute, with the results displayed in PyCharm’s Run panel. The results will look like this:
Debugging Configuration#
Note
The coverage module is not compatible with the PyCharm or Visual Studio Code debugger and must be disabled
before any debugging session. Do so by editing setup.cfg, commenting out the addopts=... line of the
tool:pytest section so that it looks like this:
[tool:pytest]
testpaths = tests
#addopts = --cov=powersupply --json-report --json-report-file=htmlcov/report.json --cov-report term --cov-report html --cov-report xml --pylint --pylint-error-types=EF
PyCharm has a debug mode that allows breakpoints to be added to code and the runtime state of the device examined. Refer to the official PyCharm documentation for comprehensive documentation on how to add breakpoints and run in debug mode.
The steps in the official documentation can also be used to debug and interact with ah Tango device, using the
configuration set up in the previous section as the basis for the debug configuration. However, full breakpoint
functionality requires some workarounds. Breakpoints set outside device initialisation code (i.e., outside
__init__() and init_device()) only function if the Tango device uses asyncio green mode. In non-asyncio
modes, Tango creates new Python threads to service requests. Unfortunately these threads do not inherit the debugging
configuration attached by PyCharm.
For working breakpoints, there are two solutions:
the device must be converted to use asyncio green mode;
add
pydevdto your Piplock as a project dependency, rebuild the Docker image and refresh the project skeletons, then addpydevd.settrace()statements where the breakpoint is required. For example, to add a breakpoint in thePowerSupply.get_current()method, the code should look like this:
def get_current(self):
    """Get the current"""
    import pydevd
    pydevd.settrace()  # this is equivalent to setting a breakpoint in IDE
    return self.__current
Troubleshooting#
SegmentationFaults when using DeviceTestContext
Unit tests that create a new DeviceTestContext per test must run each DeviceTestContext in a new process to avoid SegmentationFault errors. For more info, see:
Errors when mixing test types
Running DeviceTestContext tests after test that use a Tango client results in errors where the DeviceTestContext gets stuck in initialisation. One workaround is to set the filenames so that the DeviceTestContext tests run first.